Little by little, I've been working on two stockings that I hope to complete by Christmas, one for the Bambino, and one for my favorite Cowboy. It sure would be nice to have all three of us with the same style stockings, but I'm not pushing my luck as far as getting one done for myself this year.
Cowboy's family all has personalized stockings that were hand-sewn by his mom and mostly from Bucilla-style kits. The whole family. Cowboy, his 4 siblings, and all their spouses. That means that she has made a total of 12 of these stockings (including the one for herself and my father-in-law)! She even made a custom one for her husband when he was in the Army. She turned Santa riding a truck(?) into Santa riding a tank! She's so creative!
So when it came time for me to think about the family traditions I would like to create for us, I knew that personalized stockings were going to be included in the mix. I think it is so special for the Bambino and all future bambinos/as to be able to say "I've had that stocking ever since I can remember. My mom lovingly sewed it for me." Awwww....
When I was pregnant, I picked out the stockings ahead of time on the JoAnn.com website. I am pretty sure they sell all of the available stocking styles from Bucilla (which I've learned is a division of Plaid, who makes a lot of craft supplies). We didn't know if we were having a boy or girl, so I chose a stocking for Cowboy (Hello? one titled "Cowboy Santa")...
a boy stocking (Santa riding a carosel horse-like a Jr. version of "Cowboy Santa")...
and a girl stocking: the Sugar Plum Fairy!
I figured I'd order them after the baby was born.
When the little Bambino got here I got back on the site to place my order. I hadn't created a wish list or saved a shopping cart, so I was going by memory. Problem was, I had had a C-Section. Which required pain meds in recovery. Which effected my brain.
When I got back on the site, I saw "Cowboy Santa," ordered it and got to work. Shortly after I had embroidered Bambino's name on it, I had some clarity.
"Oh no," I told Cowboy. "This one was meant for YOU!"
Back to the JoAnn website. The carousel one was missing. And I suspect it was missing when I ordered the first one in a Percoset daze.
Well, guess where I finally found the carousel one? On E-Bay. As a "discontinued, rare Bucilla stocking kit." The new price? $99
Not gonna happen. So Cowboy and I scoured the Interweb to find the new, most perfect design for the Bambino. We finally setteled on "In the Workshop." I think it is great for a child and it doesn't push him into any interest that he may not grab on to later like a football or cowboy-themed one would.
I'm working on these kits now. I am almost done with Cowboy's--I still have to rip out Bambino's name and put Cowboy's name on--at least they start with the same letter! I am about 2/3 of the way done with Bambino's final choice. Cowboy was soooo concerned about "taking" Bambino's stocking, but I think it turned out all for the best.
Here is my progress so far:
As I took these out to photograph them, I realized that I have misplaced the instructions for "Cowboy Santa." Good thing I'm almost done! I haven't sewn the back on to either one yet. When I do, I will post and share with you a trick I learned from my sister-in-law (who sewed one for her little man last year) that is not in the instructions, but protects your stocking from getting the threads pulled when Santa places gifts in it.
And if you would like to order your own kit, here is the link on JoAnn's site. Which kit do you think I should I get for myself for next year?
I promise you they are pretty easy. They look intimidating because they are visually intricate and they DO have a lot of parts. "Cowboy Santa" has about 82 parts and I almost fainted when I opened "In the Workshop" to find that there are 160 parts. But the directions are clear, and if you can sew a button on a shirt, you can figure them out.
And so what if they turn out a little "off" and the stitches are a little crooked? One day, your bambino will say, "My mom made that with her very own hands..."
Because it's handmade.
"Handmade (Not Homemade)" describes the way this Denver blogger approaches her many projects in life: creating, inspiring, loving and exploring. Living life to it's fullest requires more than a rag-tag assortment of homemade theories and thrown-together decisions. But the goal is not perfection, for handmade items and actions have a slightly imperfect organic charm.
Tuesday, November 16, 2010
Monday, November 15, 2010
Applique Kitchen Towel Tutorial
I was so excited about the beautiful fabric for my new kitchen curtains that I was inspired to make a matching/coordinating kitchen towel with the beautiful bird theme, as you may recall. Here is the completed project!
I was already getting out my applique supplies to make a custom-order T-shirt for a friend, so I thought I'd piggyback this selfish project on to the afternoon. Here's the T-shirt I made, using the same technique that I will teach you below.
I make a wide variety of applique onesies and T-shirts that I plan to sell on my Etsy site, HandmadeNotHomemade.Etsy.com The Bambino was wearing one of my creations this very day (as he does most days). Here, he is celebrating a flip from his tummy to his back. It's his new thing.
But I digress... Here is what I gathered to make the kitchen towel: a towel set I bought from Walmart for $4 (I looked for a kitchen towel that had a flat texture-one with a deep waffle weave will distort the applique after washing), Heat 'N Bond iron-on interfacing, iron, thread to match my beautiful fabric, sewing machine, and the fabric itself. Here is the label from the brand of interfacing I use. It has double-sided iron-on capabilities that I will explain in a sec.
First, I made a rough cut-out of the motif I wanted to isolate for the applique. Cut it bigger than what you want to be the final shape.
Then, cut a matching piece of the interfacing. The interfacing can be slightly smaller than the rough-cut, but needs to cover the ENTIRE portion of what will be your final shape.
Lay the fabric face down, and iron the interfacing to the wrong side of the fabric. For this brand of interfacing, you will be ironing the paper side. The dotted rough side will be touching the fabric. You only need to hold the iron in place for 2 seconds using the cotton/linen heat setting with no steam. See how it goes almost all the way to the edge?
Now cut out your shape as detailed as you want it to be. Warning: if you cut every nook and cranny, you will have to maneuver your fabric through the sewing machine to get to every nook and cranny, which is not easy & if you mess up, you will get frustrated-this is supposed to be fun and easy. I like to leave just a little bit of breathing room around my shape (about 1/16") to leave room for my zig-zag stitch. If I cut right on the line of the motif, my stitch will cover it up. Also, I like to make fluid cuts with as few sharp corners as possible.
Once the shape is cut out, peel the paper backing off of the interfacing.
Then place your shape exactly where you want it to be on the kitchen towel. Using your iron on the same setting as before, iron each area of the shape for 8 seconds. Now it should be 'glued' to the kitchen towel.
Time to sew! Change out the thread on your machine to the thread that matches your fabric applique. Also change out the bobbin thread to the same color. I used to think that I would use bobbin thread the same color as my base material (in this case, the kitchen towel) in order to not have a different color outline on the wrong side of the fabric. But sometimes, a bobbin thread is pulled up from the back and shows up on the front, so it is better to have all matching thread for a neat final product.
I set my machine to do a not-very-wide zig-zag stitch and not super-fine, either. I find that if I mess up and have to rip out some stitches, a super-fine zig-zag ends up making a hole in the fabric. Now, carefully sew around the shape. Maybe it is because I am right-handed, but I like to place the right part of the stitch barely on the outside of the shape and the left part of the stitch into the shape, so that pretty much all of the stitch is on the applique. Some people like to 'straddle' the applique with the stitch. However you wish to do it is fine! Here is the detail of my stitching. See how it is on the very edge of the applique?
Trim the extra threads off, and you're done!
Here is another picture of the final product, ready to be used. Tess decided to poke her nose into this photo and it was too cute not to share.
Lest you think that I've been slacking on my other projects, I'll have you know that I've been working on my Christmas stockings little by little every day, usually after the Bambino goes to bed. I'll share those next, even though they are not complete, simply because you still have time to do some stockings yourself. Maybe you'll be inspired...
Friday, November 12, 2010
Custom Rod-Pocket Curtains-Part 2
Welcome to Part 2 of our Custom Rod-Pocket Curtain tutorial. It's time to cut and sew our fabric!
I lay my fabric out on the floor to cut it because I think it is easier than putting it on the dining room table, which never seems big enough. So... I laid my fabric out on the floor, measured, and made a cut at 58 1/2". I started measuring at the place the fabric was cut when I received it. For other projects I have done, I have made sure to choose a place to cut it if I don't want to mess up a fabric's pattern.
One of the things that makes a handmade curtain look professionally made is pattern matching the fabric of the 2 panels. Once the curtains are hung, if the pattern matches, it creates a harmonious look. If the pattern does not match, there will be a distraction that the "looker" may not be able to put his or her finger on, it will just appear "not quite right," and a little homemade ;-). To match the fabric pattern for the second panel, I place the rest of the fabric on top of the first piece I cut, lining up the fabric pattern in the process. Once it is all aligned, I cut 2 new edges (the top AND bottom) for the second panel. A bonus of using this method is that you do not have to measure your second panel, and the panels will be exactly the same size. So, even if you mis-measured to being with, at least the panels will match in the end. I folded back the fabric in the picture below, so you can see how the fabric pattern matched.
Now, it's time to iron! The first thing you should iron is the hem, not the sides. I turned the bottom under 1/2" and ironed, then another 1 1/2" and ironed. Then I pinned it in place. Using my machine's blind hem stitch, I finally got to sew! You could use a regular old straight stich, but a blind hem looks way more professional. Check your machine's instruction booklet on how to use the blind hem feature. It is not hard at all, but every machine is a little different.
Once the hem is in place, it's time to iron the sides of the fabric. But wait, how did I determine the width of the fabric? Well, I just used the width of the fabric I had. 45" and 54" are standard fabric widths. But to determine the width of a professinally made curtain, you would multiply the width of the rod by 2.5 for the proper fullness (if you are making curtain panels that are decorative only and not for light control, i.e. you would never close them, you would typically just use the width of the fabric--the 2.5 formula is for curtains that span the entire length of the rod). My rod, once installed, was 18" wide. My math is below. As it turns out, the number I got is close enough to the natural width of my fabric, so I just used that.
Back to the ironing, I ironed in 1/2" to hide the raw/salvage edge and another 1" for the side hem. I am not going to sew the sides right away. The third thing that sets handmade/professional curtains apart from homemade curtains, in addition to pattern matching and blind hem stitching, is lining. I am going to line these curtains. There are many kinds of lining available for you to purchase at the fabric store and most of the differences have to do with light control. I want to let in as much light as possible, so I chose a standard, thin, probably the least expensive lining available for this project. When I sewed curtains for the Bambino's room, I chose black-out lining so it would block out the light for daytime naps. So, back to the task, it is time to cut and pin in the lining.
Cut a piece of the lining fabric the same size as your cut length of the curtain fabric. Adjust the lining fabric so that is is about 1/2-3/4" from the final bottom hem. Then, tuck the lining into the ironed-down side hems and pin in place. The lining is NOT sewn into the bottom hem, that's why we did the bottom hem first. If you look closely at the picture below, you can see the thread in the bottom hem and how it makes a few straight stitches, then a little "tic." That is the pattern of the blind hem stitch.
Use the blind stitch to sew the side hems. Here is the best picture I got of that. You can see below how you have to fold the fabric under to make a blind hem stitch. Again, check your machine's instruction booklet on how to do this.
Finally, it is time to iron down and sew the rod pocket. I turned down the top edge 1/2" to hide the raw edge, then another 2" for the pocket and ruffle. See? In this photo, the 1/2" is already folded under and ironed.
Then I sewed, this time with a straight stitch, at 1" from the top to create the ruffle, and 2" from the top (really right at the edge of the fold) to create the pocket.
Iron all the seams down to create a polished look, and go hang your curtains! Ta-da!Here is my final finished product (this photo was taken after the sun went down do you could see the detail).
Look at the subtle horizontal lines the pattern matching creates-you can see this most clearly by looking at the red elements in the fabric. Notice anything? While I did not mention it in the tutorial, I did a tricky thing... the particular fabric I had is hand-stamped and artesin created, so did not really have a "right" or "wrong" side. Because of this, I decided to make the panels mirror images of each other. I also did this with the side hems-the outside sides have a patterned band that happened naturally in the fabric pattern. Because of the hand-stamped nature, the inside band was faded a bit, so I just turned that side under more. A happy accident on the part of the fabric stampers turned into a really neat custom detail!
So, this project kicked off a couple of ideas for projects-to-come (as if I need more projects). I have a bit of curtain fabric left over, so I'd like to isolate the bird designs and applique them onto some matching kitchen towels. Are the birds in the fabric lovely?
I think one would be great appliqued onto a red kitchen towel. Shhh... I may have bought some towels to this this project already! I know, I promised, but I just can't help myself! Stay tuned and I'll show you how.
Also, as I passed through our breakfast nook, I looked out the window and here's what I saw:
Time to make some more curtains!
Custom Rod-Pocket Curtains-Part 1
For my first blog project, I have decided to sew curtains for my kitchen and teach you how to make your own! Here is how mine turned out. Aren't they beautiful? This picture is not the best since it is hard to see the detail for all the light coming through. I took a different picture in the evening to share with you at the end of Part 2 that shows the completed project in greater detail. Enjoy!
Making curtains for my kitchen is a MUST for the following reasons:
1) There is construction going on next door. Every morning when I go to the kitchen to make my coffee, the workers next door, who get there bright and early, can see me in my bathrobe or whatever else I am or am not wearing. But it is usually a bathrobe ;-)
See, they were nice enough to wave when I asked to take their picture:
2) Our house is 100 years old with 100-year-old windows. They are not very warm and the kitchen window actually has a chunk of wood taken out of it. Perhaps curtains will do a teeny-tiny bit to help insulate.
3) My sis-in-law gave me some be-you-ti-ful fabric from Liberia (where she lives) that would look georgeous on the windows! What I love about the fabric is that it came from halfway around the world, it has a really neat bird and sea coral motif that I find interesting, and it is just the right color to coordinate with my painted cabinets and the artwork that already hangs in our kitchen. And even though the fabric is from Africa, it doesn't look too too ethnic to change the vibe of our decor. It is simply ecclectic!
So here's the how-to on making custom and professional quality rod pocket curtains.
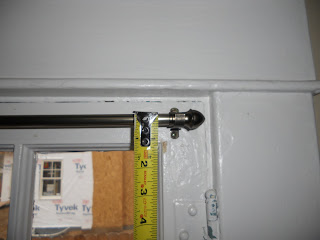
The first step in making curtains is hanging the curtain rod. You want to do this first so that you get the correct measurement for your finished curtain. Lucky for you, I know all the tips and tricks for using a drill when doing a project such as this. Sometimes ladies are intimidated by using power tools but a drill is the easiest of them all if you keep a few things in mind. I will pepper the tips in and bold them for you as I install the rod in front of your very eyes.
First, determine where the rod should be placed and hold the bracket where it needs to be. Make a pen or pencil mark so you know where to drill your pilot holes. Remove the bracket from the area. Choose a drill bit that is slightly smaller in diameter than the screw you will use to hold the bracket in place. If the pilot hole is too big, the screw will have nothing to grip on to. If it is too small, you may have a hard time getting the screw into the wall. When you drill, make sure the arrow button on the drill that points toward the wall is pressed. Once you have drilled your hole, press the arrow button that points toward you to make the drill bit come out of the wall. This is probably the most important thing to remember. Many times you can get frustrated because it is "not drilling." The first thing you should do is check that it is not in reverse. If you can't drill deep enough, move up one rung on your ladder or step stool if you can. The drill should be at about shoulder height so you can use your abs and body weight to press it into the wall.
Once all your pilot holes are drilled, switch the drill bit to the screwdriver bit. Place the bracket in place and hold a screw into the hole. Making sure you are high enough on your ladder, begin screwing in the screw. I like to use short bursts of the "trigger" on the drill to screw in a screw. This helps you not strip the screw as it goes into the wall. Hard pressure is usually necessary to keep the screw bit in the screw as you drill. Wait a minute! Did the screw not go in? Check the direction arrow on the drill again. You probably left it on reverse when you finished up your last pilot hole. You're welcome.
Now, snap the rod in place and you're done!
My little Bambino was quite entertained by the sound the drill made. He would like a drill for Christmas, but he's a little too young. I'm glad I could show him at an early age that ladies can use a drill, too!
It's time to measure the window for your custom curtains. Place the tab end of the tape measure at the top of the rod like this:
and measure all the way down to the length of where you want your curtain to hit. I want mine to skim the window sill. My measurement was 53", see?
To determine the finished length* of your curtain, add however much you would like the curtain to "ruffle" above the rod. I would like mine to go one inch above the rod. So my final finished length will be 54". Here is my math, below. *Finished length refers to the final measurement of the curtain when the hem and the rod pocket are sewn.
Note: Because I have a skinny rod, I knew that a 1" rod pocket would be just fine to accommodate the diameter of the rod. Thicker rods may need 2 or 3" to hold their diameter. I did not have to add any extra "length" to my curtain to make up for a thicker rod.
To determine the cut length* of the fabric, I like to draw a little diagram for myself. First, I draw a rectangle that represents the finished length of the curtain and write down that measurement. Then, I add on the hem, which is on the bottom. I added a 1 1/2" hem. For that, I need to add 2" to the finished length: 1 1/2" for the hem and 1/2" for the turn-under that hides the raw edge of the fabric. Next, I need to add some length to the top to take care of the rod packet and the top ruffle. The ruffle is 1" and the pocket itself is 1". I also need to add 1/2" for the raw edge turn-under. So that is a total of 2 1/2" for the top. Final cut length is 58 1/2". See my diagram and math below. *Cut length, if you haven't figured it out, is the length of fabric I will actually cut to make my curtain.
Now we are finally able to start playing with fabric! See Part 2 of this tutorial to find out how to actually sew it all together and see the beautiful clear picture of the final product.
Monday, November 8, 2010
And so it begins... or "And so it finishes" ;-)
I have had so many ideas about what I wanted this blog to be from the beginning. I wanted it to be part personal journey, part craft tutorial, part rants and raves. I have finally decided that it will be what it ends up being.
That said, I am starting a new/old adventure that I hope to document here. Projects. I do a lot of them. Mostly craft and decorating related.
Which means I buy a lot of supplies.
I have a queue of projects waiting to be started and/or waiting to be finished. And that is what I would like to work on over the next year-finishing all that I have started or meant to start.
I am still on the fence regarding if I want to give my self a common blog challenge such as "365 crafts in 365 days for $365." Sure, I don't need to spend any more money on supplies, but I also would like to reward myself with a "new" project after several "old" ones are completed. For example, I'd love to have some cafe curtains for the breakfast nook, but would need to buy fabric for the project. So... the logical thing is to complete, say 5 "old" projects before rewarding myself with a fabric shopping trip. Then I shouldn't start another "old" project until the "new" one is complete. Make sense?
So I will start with a list of 5 projects I have supplies for that I must complete before starting a new one. As the list gets crossed off, I will also dig through my myriad supplies to come up with other projects that can use up all that I have with minimal extra purchase (ex: if I want to make a piece of jewelry, I will look at the supplies I have on hand before going out and getting all new things to complete it, or I will look at what I have, then find inspiration online to use what I have to create a similar project).
So here goes: my first top 5! Tutorials for anything not self-explanatory and pictures are sure to follow!
1. Wyatt's Christmas stocking (from a Bucilla kit)
2. Will's Christmas stocking (also from a kit)
3. Fabric ring stacker for Wyatt's Christmas gift from a pattern I purchased when I was pregnant.
4. Curtains for kitchen. I received the most beautiful fabric from my sister-in-law who lives in Liberia Africa. There is construction going on next door and the workers can see me in my bathrobe every morning. Not only do I NEED new curtains, but I had the intention of making them the second I got the fabric from Em.
5. Quilt repair on a quilt I would like to use as Wyatt's play mat, but it has a few "scars" that need mending.
But first, I will make a fabric applique T-shirt for my friend's daughter, V. She is actually paying me to do this, so it is priority #1. Then let the fun begin...
Friday, October 1, 2010
My Front Porch
So what does the home of two creative minds look like? Well, take a look at my front porch right now. I admit that it is usually in various states of disarray and an ever-evolving collection of items in progress. Here's a snapshot and a list:
1. 2 strollers (1 jogging 'cause we're currently in training for a 1/2 marathon, and 1 regular that accompanies us on our morning walks to Starbucks)
2. Car seat for our little bambino
3. Unpacked suitcase from last weekend's trip to Vegas for a convention
4. Laundry basket full of props I was given from the last house I staged-it is awaiting a trip to Goodwill b/c the stuff was hideous and I wasn't able to work with it.
5. Round table covered with a brown tablecloth-this recently came from a different house I staged and currently doesn't have a home in a staging project right now. I was going to set the porch up temporarily as a game room (a. we like to play board games with our friends and b. I like to take my extra staging stuff and set up a temporary vignette on the porch just for fun)
6. Burp cloths I made on the table ready to be photographed and sold on Etsy. HandmadeNotHomemade.etsy.com
7. Behind the table are: Box #1-full of items also awaiting a trip to Goodwill. These items were leftovers from our impromptu Labor Day garage sale which netted us a total of $35 and a big pain in our arse. We ended up turning it into "lazy man's garage sale" where we placed a sign outside on the stuff that said "Interested? Knock or call 303.249.xxxx" which actually worked.
8. Box #2-full of items awaiting reinvention/rejuvenation/resellination when my friend Jamie and I start our as-to-be-named interior design business.
9.Box #'s 3-8-full of items invented by my father-in-law that were recently manufactured and waiting to be photographed before they are moved to our inventory location in the basement and sold via the company's website. If you are reading this blog, you are probably not interested in the product, b/c it is so remote from crafting, etc. that I will leave it a mystery since cross-marketing will do that product no good whatsoever.
10. Giant pot full of branches-that's just cool and there for decoration!
11. Sweet Tess, my favorite dog in the world, who, when I'm not home, can probably be found laying in the very-expensive-and-now-ruined Toile chair on the opposite side of the porch. You know, the nice side.
Subscribe to:
Posts (Atom)