
This is what this little gem looked like a few days ago.

I had been looking for something to makeover for a task light to fit under my upper cabinets in my craft area. When I saw this at the thrift store, I knew it was prefect for the kind of makeover I had in mind.
First, I spray painted the base glossy white, just like my other lamp.
Then I got to work on the shade.
Using scraps of fabric, I tore strips (yes, tore) about an inch and a half wide. I tore them so they would have little frayed edges. To do this, you just need to make a little scissor cut in the fabric, and rip away! It should tear right on the grain line.

Then I took my pile of strips to my sewing machine. Using a medium length stitch, I pushed the pedal slowly and in little spurts, so I could manually gather the pieces into ruffles by pushing the fabric under the presser foot as I went. They did not need to be perfect, so there was no way I was going to spend a lot of time doing ruffles the traditional way (sewing a long stitch, then pulling the bobbin thread to gather the fabric).
I also did not gather each piece individually. I connected one piece to the next into one long running stitch.
When I had a good long pile of ruffled strips....

I got out the hot glue gun. First, I used dots of glue to cover the bottom and top edges of the shade with some packaged seam binding I had on hand. If you have a plain shade, you can skip this step. Also, if I had been working with fabric in shades of blue I would have skipped this step as well. This pic is a little bleached out, but you can see at the bottom that I used light yellow binding.

While I don't have a picture of the next step, it's pretty self-explanatory. Starting at the bottom, use dots of hot glue to attach the ruffles to the shade. Wrap around and around, covering the top of the row below, until the shade is totally covered!
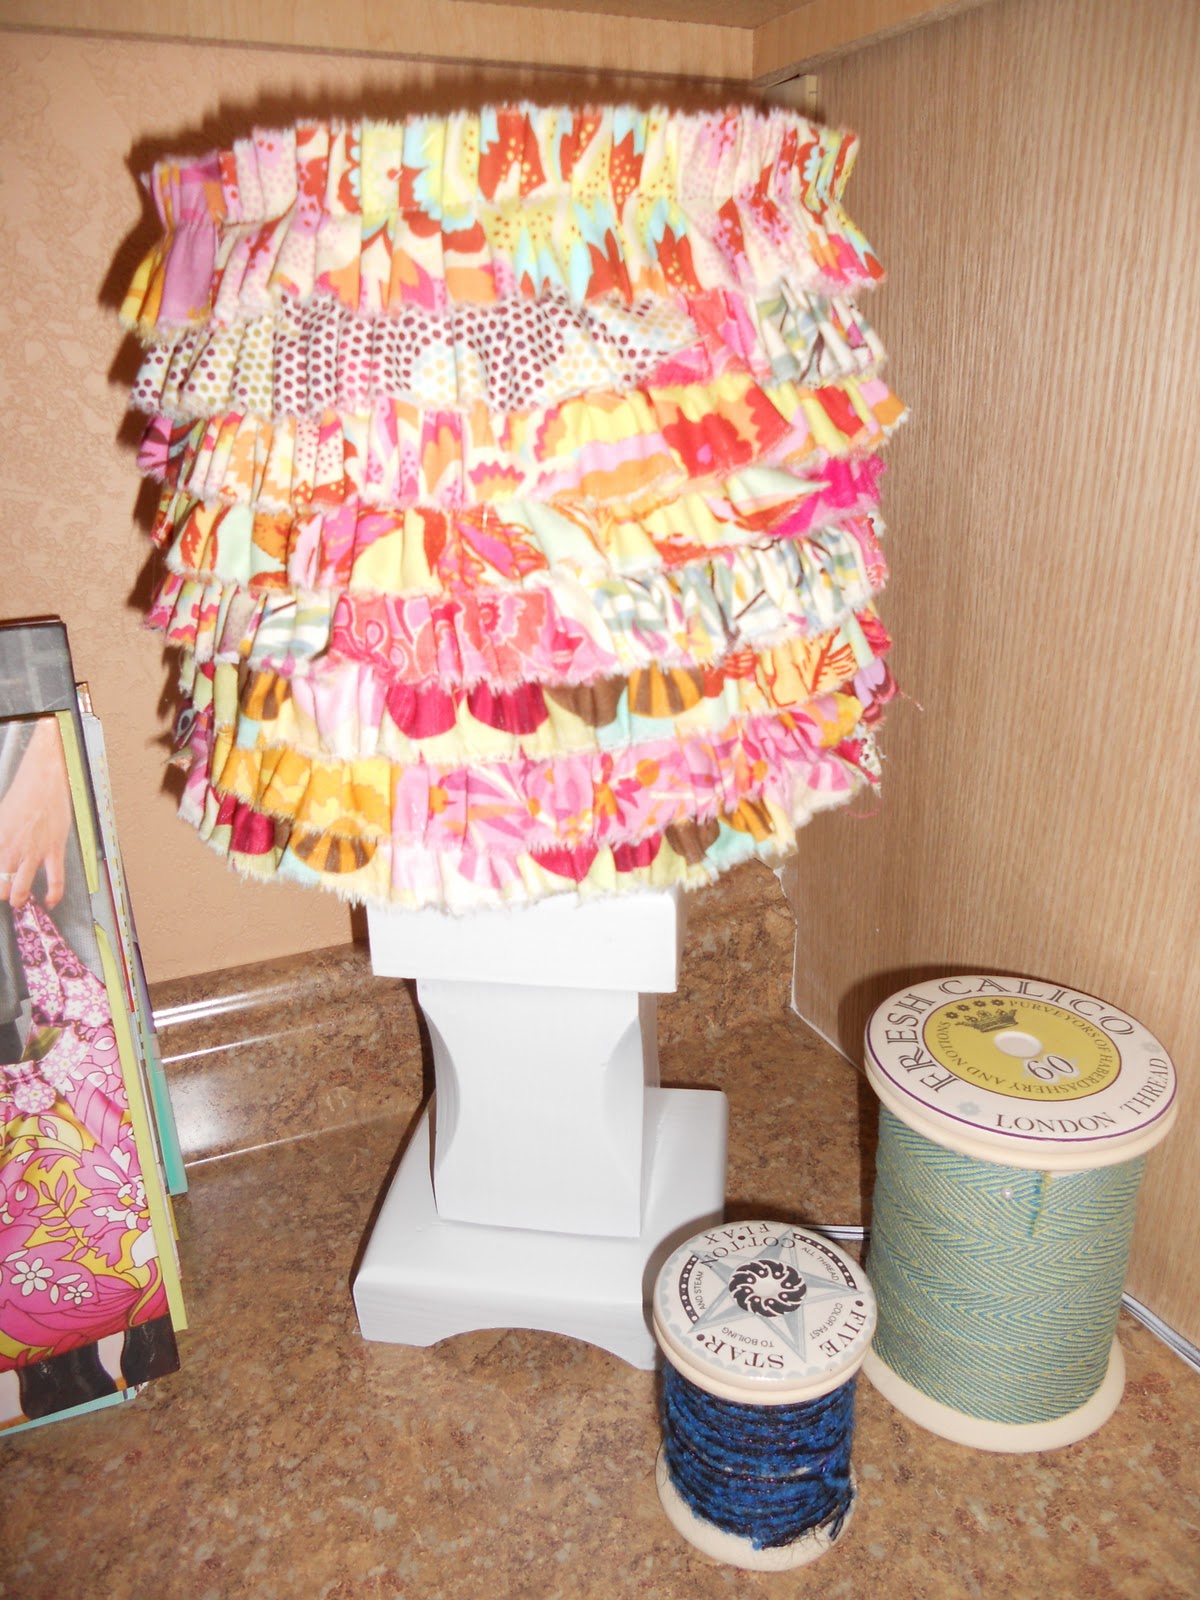
Here's the final result!

It fits perfectly under my upper cabinets, and gives me some great task light for when I'm sewing or working on other projects.
Oh the cost? The lamp and shade together were $4.99 at the Goodwill. I used the same spray paint from another lamp project, and the fabric strips were leftovers from a pillow project.
Wait a minute... the lamp itself was actually free. I had used a Goodwill gift certificate to pay for it (I got the gift certificate by attending a benefit for Goodwill where I got to meet Mondo from Project Runway). How cute is Mondo?

I guess we both like to turn patterned fabric into pretty things!
ACK! I have Mondo envy! That's awesome.
ReplyDeleteIt was great meeting you and Wyatt at the park today. Sweet blog and fabulous projects!